Revit door families need to be better
If you need a set of quality door families check out our door collection page.
I do not know about you, but my Revit door family library consisted of either simple doors that have little to no flexibility for custom options, were overbuilt, were confusing to modify, or are bloated file sizes that slow down my project files. (Why is this single swing door 2.5Mb?!)
So…

My old door library was found online, free, or came with Revit. I know, it is my own fault. It is hard to find time between projects, or during, to set up multiple families and unify graphics, parameters, and features across the board. Classic band-aid situation.
Hours started racking up, editing and re-fixing existing door families to suit the current project that migrated from an older project with a similar mindset. Money was wasted on every project. NO MORE!
I sat my self down and put all non-critical duties aside to create a robust door panel family system.
Door family goals:
Family must be light weight.
No unnecessary parameters! Heavy families slow down project files, even with top of the line machines.
Flexibility to easily switch out door panels and hardware for custom designs.
So I can replicate manufacturer doors without relying on their overdesigned families.
Allow custom panels to be modifiable in the Project Browser.
Having to modify a family inside the Family Editor every time is a pain.
All parameters to be schedulable.
Revit standards and manufacturer families do not have schedulable parameters aside from the hard baked parameters, i.e. height, width, thickness, etc…
I can graphicly modify each component of the family using Object Styles.
Once I have the families set up for myself I am good but I know everyone has their own visual graphics standards.
This was certainly a high bar I set but satisfying to set up.
Modeling Plan
Before starting, most families are generated with one of two modeling plans: everything is modeled in one file or split off key components into separate families. Most families are created using the first method. The main benefit, this keeps everything is one place and keeps the file size small. However, this can make even a moderately complex model overly complicated to troubleshoot let alone edit, even if you do know what you are doing. I am not the only one using these families so this is not the best method. As much as I want to keep the files as small as possible, separating components helps with the other goals.
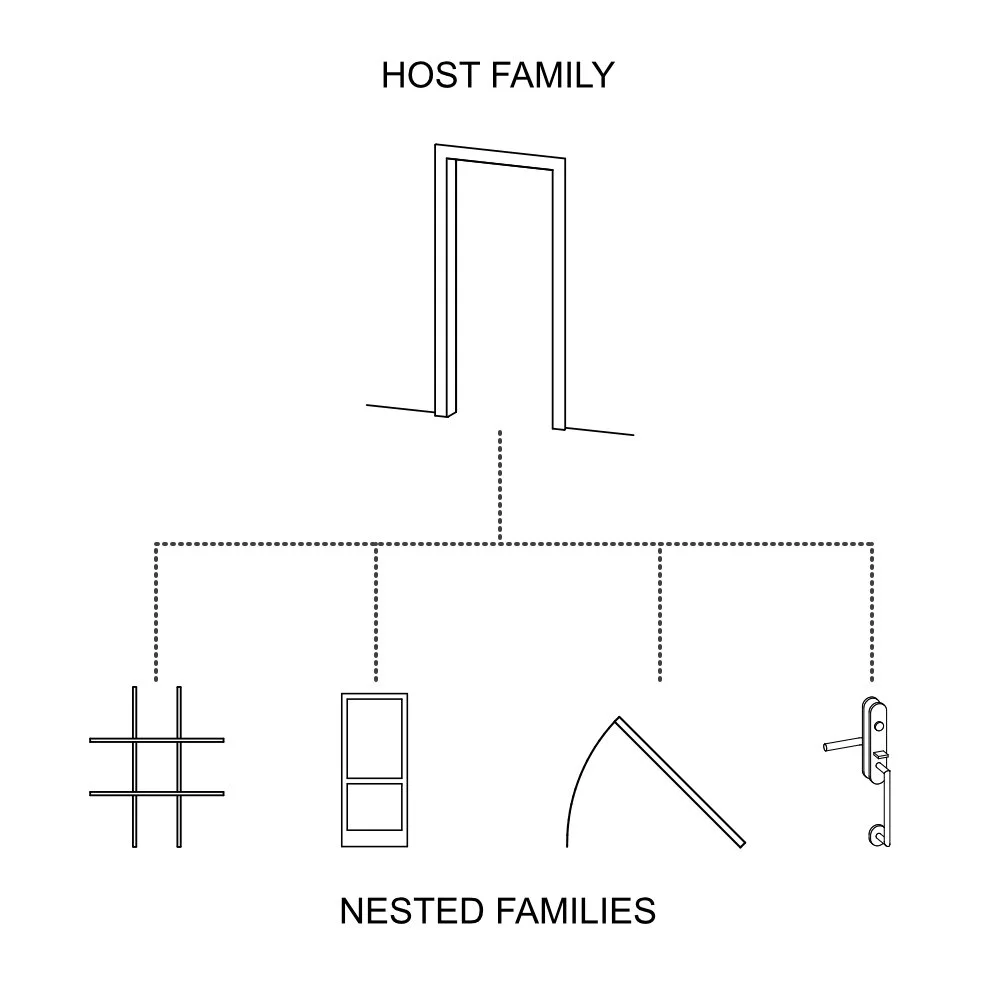
I decided to work with the nested family modeling method to help hit all goals for the project. This method focuses on splitting up key parametric components into separate pieces to easily assign parameters, nest those components inside a host family and link parameters in the host family through association. This provides order and makes modifying the model easier, especially for someone who did not make the model.
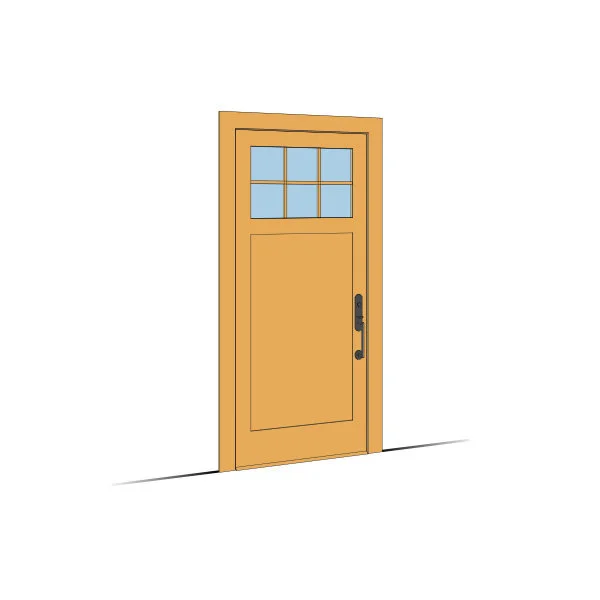
Door family structure
The families are broken into five essential sub components:
Door Frame: Host
Opening Annotation: Nested
Panel: Nested
Hardware: Nested
Muntins: Nested (for glass panel families only)
It was essential I host all parameters inside one file and not nest families on top of one another. This keeps steps, when editing families, shorter and easier to troubleshoot problems.
Parameters
Next, I needed to set up the parameters plan. If you remember, one of the goals was to schedule each parameter, if I wanted. By default, Revit only allows certain prebuilt family parameters to be scheduled.
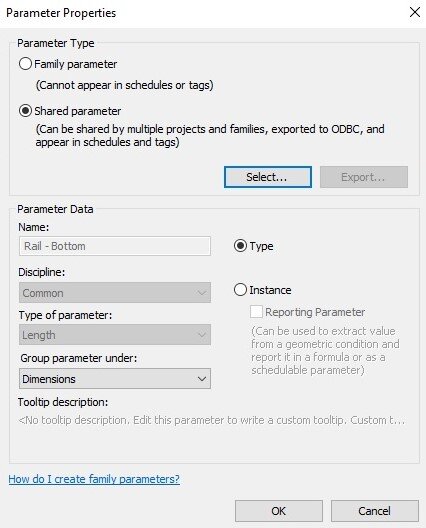
There are two ways to accomplish this, I can create parameters inside the project file and assign them to the family category (these parameter fields are not linked to the family therefore, I must manually edit every change), or use Shared Parameters which populate inside the project file once imported (these link to parameters loaded inside the project file and automatically update when you change any setting in the family). Typically, Shared Parameters should be used by default when building families for better BIM implementation, aside from a few exceptions.
(At some point in the near future I will create a post outlining the “how-to’s” for setting up shared components for new families.)
Replacing nested components
I made a selection of prebuilt panel components that can be swapped in to create a new door or a new panel type can be created by anyone by modifying any of the existing families.
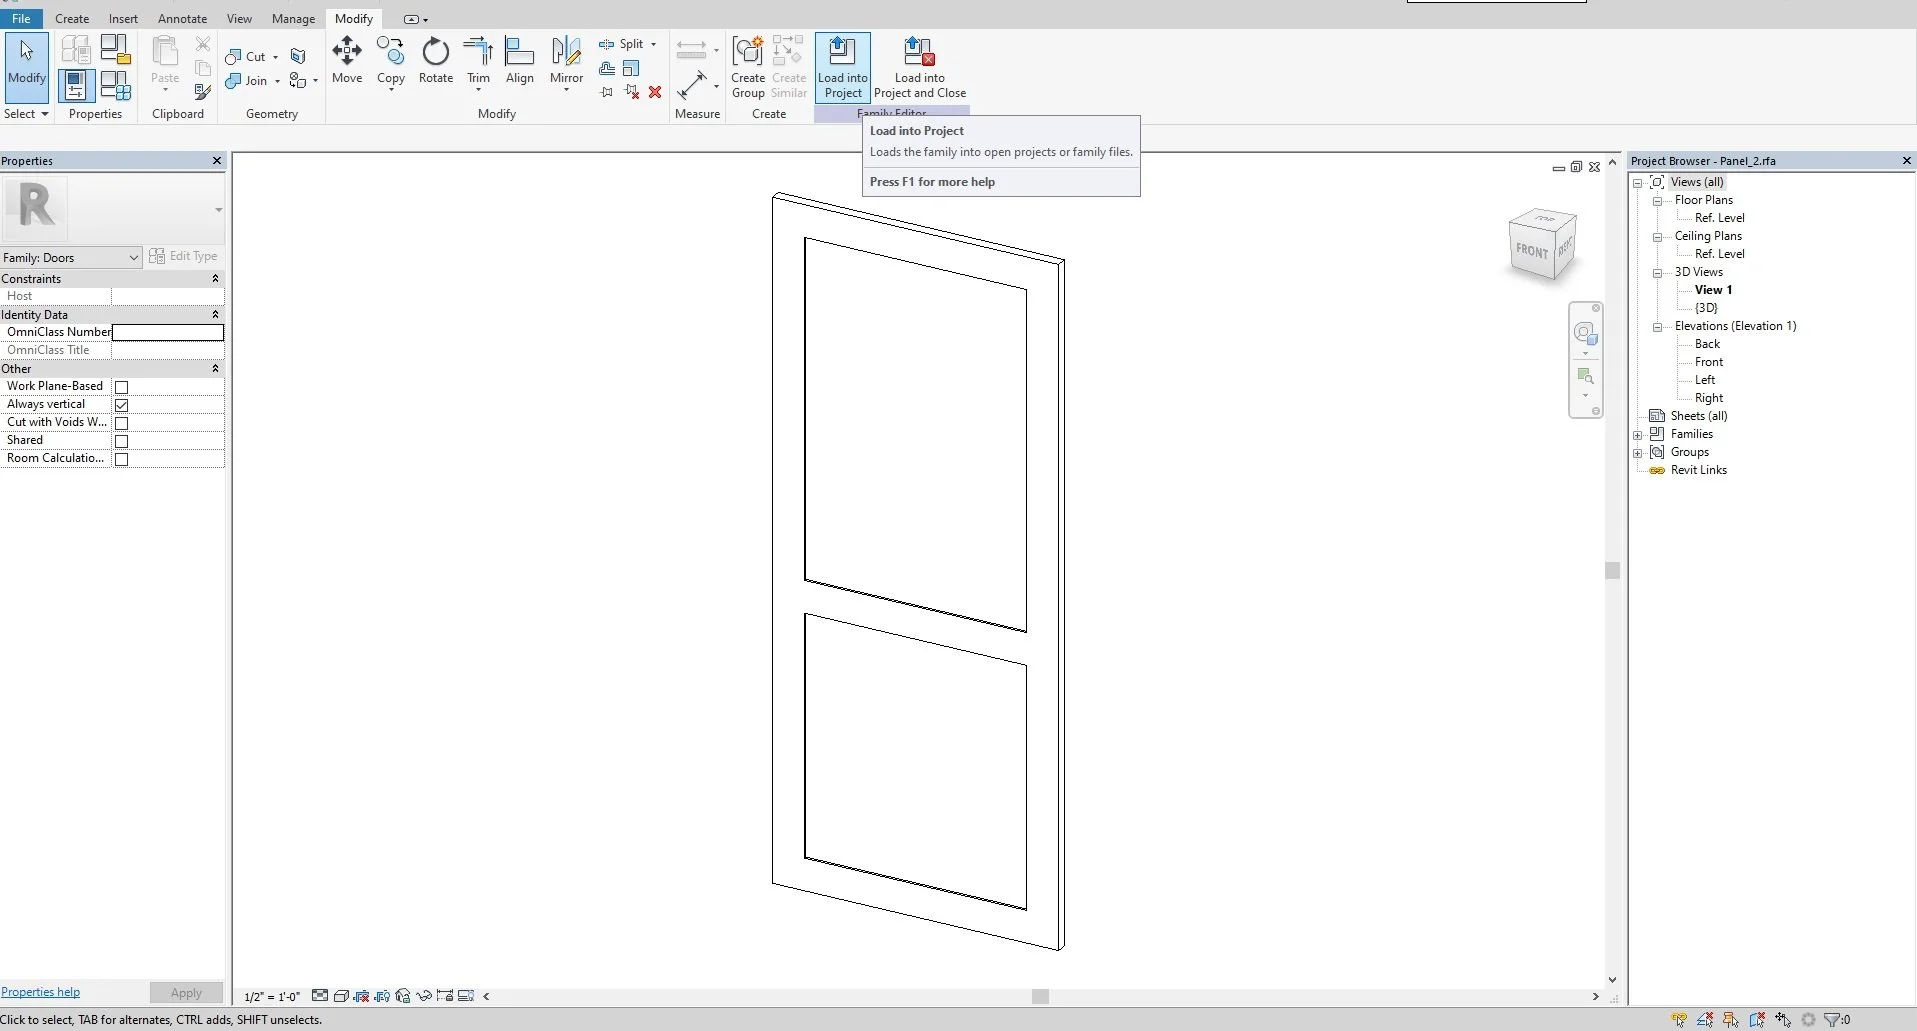
Once ready we load the panel into the family host file.
Once loaded, the new panel needs to associate its nested parameters with the host parameters. (Think of them as passthrough parameters, this will allow modification of the stiles/rails from inside the project browser.)
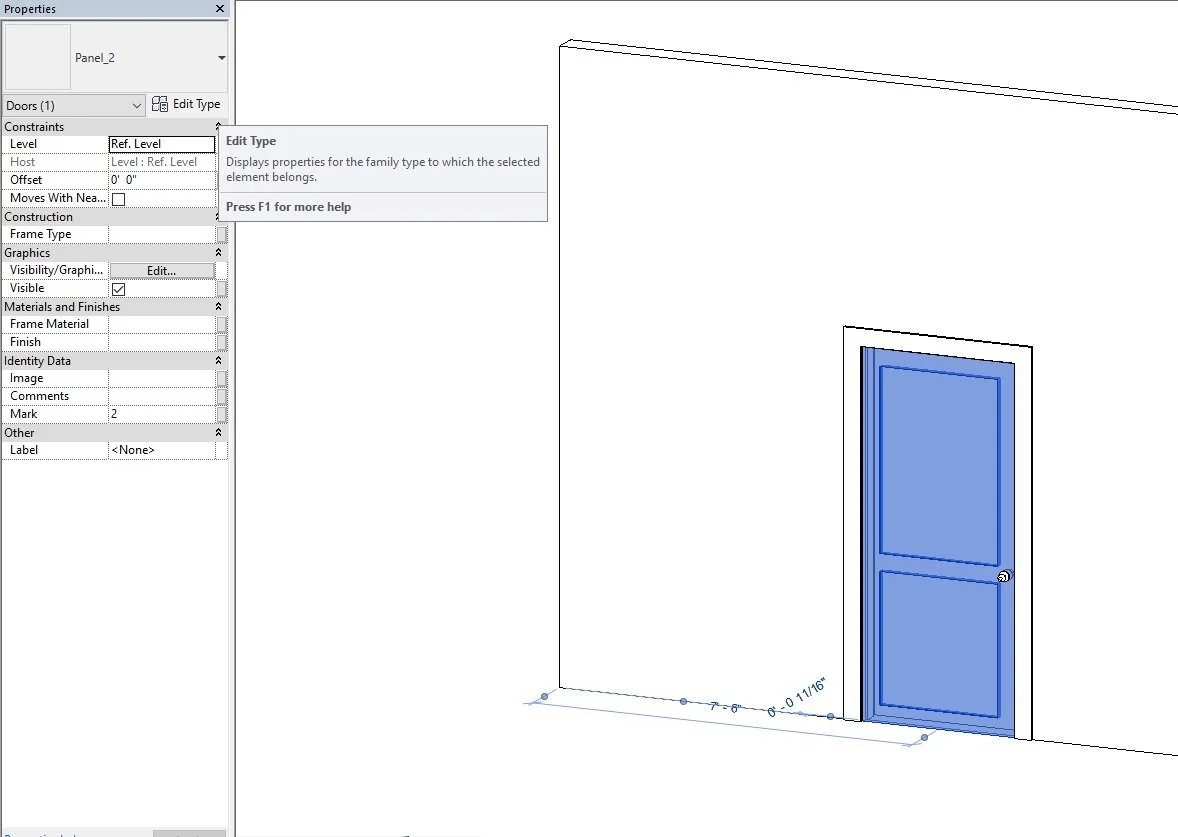
After selecting the existing panel, in the Properties Palette, click the down arrow, select the new loaded panel, and click Edit Type.
Select the panel and click Edit.

Inside the type properties window under the right column, (equal sign) click on the box to associate a parameter with the host parameters.

Inside the Associate Family Parameters window scroll down to select the correct parameter to associate.
Once complete the parameter will grey out and an equal sign will fill in the right column.

Finally, align and lock the nested family with the host family reference planes. This will make sure the nested family stays in place when adjusting host parameters.
Save new door family, for future projects, and load into the project.
This same principle applies for door hardware, muntins, plan swings, or any other family components to be nested into any door family.
Do not worry, we have typical multiple door panel types already put together in the collection.
Finishing Touches
All that is left is to insert the nested components into the host family, and associate the necessary parameters. Once this is complete, we have ourselves an excellent door family.
The best part of this modeling system, everything is set up to be swappable. If I need a new panel type or a different hardware configuration, all I do is model the new panel nested component, insert into the host family, associate the new parameters and done! No new family from scratch and all I had to do was swap parts. Like putting in new batteries!
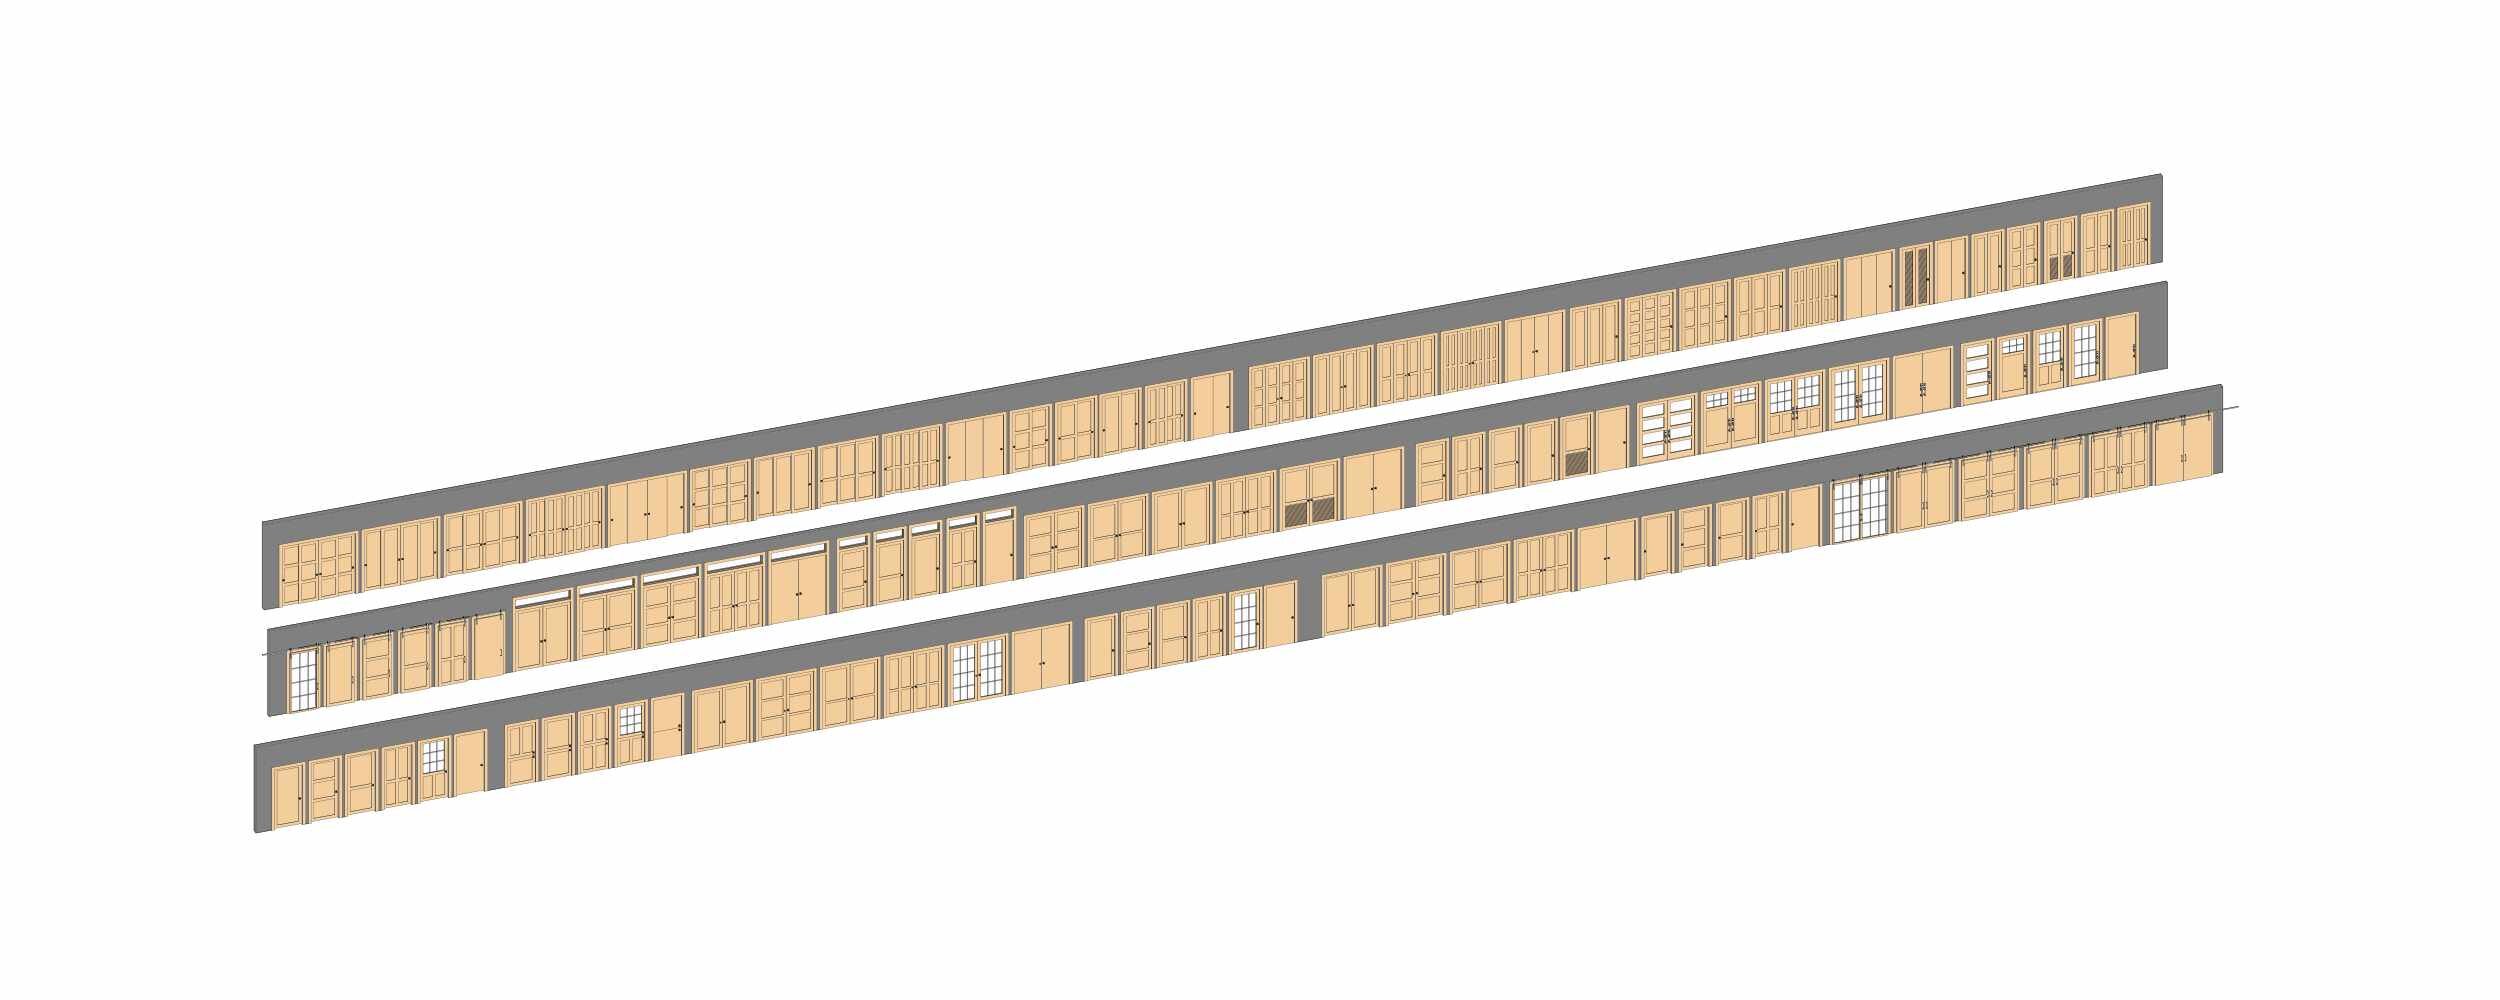
I built a robust 130+ library to really round out the 22 different opening styles, with single, double, triple, and four panel variants, using 10 different panel styles. This way I no longer need to scrape the 6th page of Google for a specific family type and I can easily mix and match my existing catalogue.
If you want more details links to the product page below. If you are unsure, at the bottom of the page you can download a free door sample along with our door users guide.
Feel free to contact us if you have any questions.